

We brought out the architect’s blueprint and designed our data journey like pros. And guess what? We even set up our trusty JIRA Board to keep things in check – tasks, progress, and all the good stuff neatly organized.
But hold on tight, because today’s spotlight is on the ‘Epic Data Migration: SQL to ADLS2’. Think of it like shifting a lively party from one room to another – only it’s your SQL data grooving its way into the Azure Data Lake Storage Gen2 (ADLS2) dance floor.
What’s new today? Well, we’re putting our architect hats back on, but this time we’re building bridges for data. We’ll make sure everything’s flowing smoothly from SQL to ADLS2, just like a river finding its way.
So, squad, gear up for an architect-data superhero crossover! We’ve got blueprints, JIRA, and tech magic on our side. Let’s rock Day 3 like never before!”
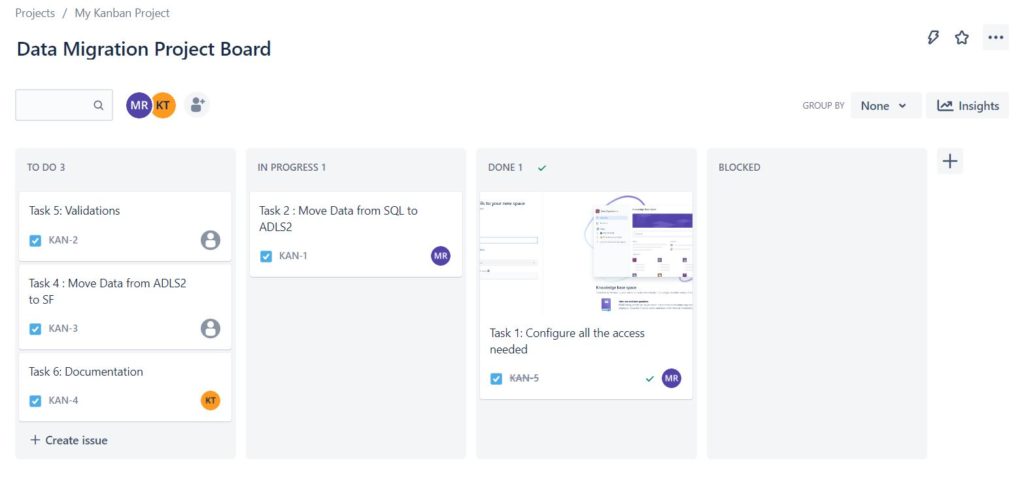
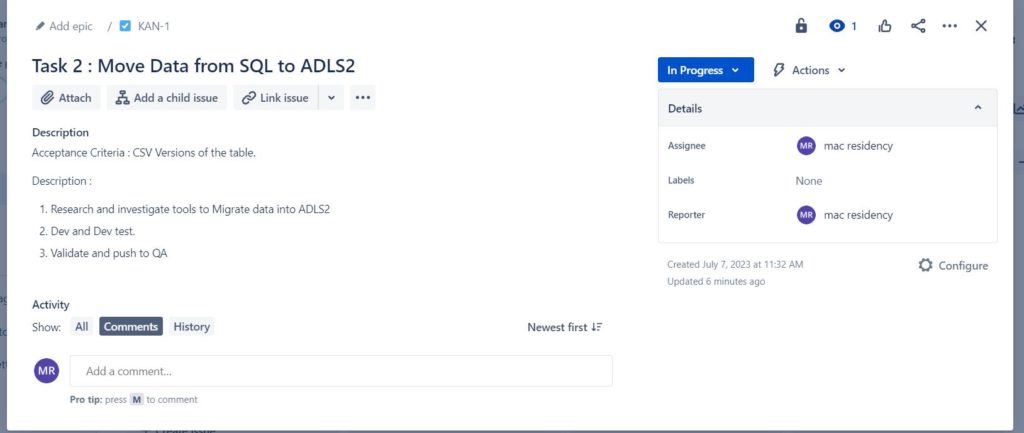
JIRA Ticket
This is how an ideal ticket would look like in a company. There maybe some missing pieces here and there where you may be required to reach out to people for the requirement gathering which is usually the person who creates the ticket for you in the first place.
Lets Start! – Setting Our Environment First
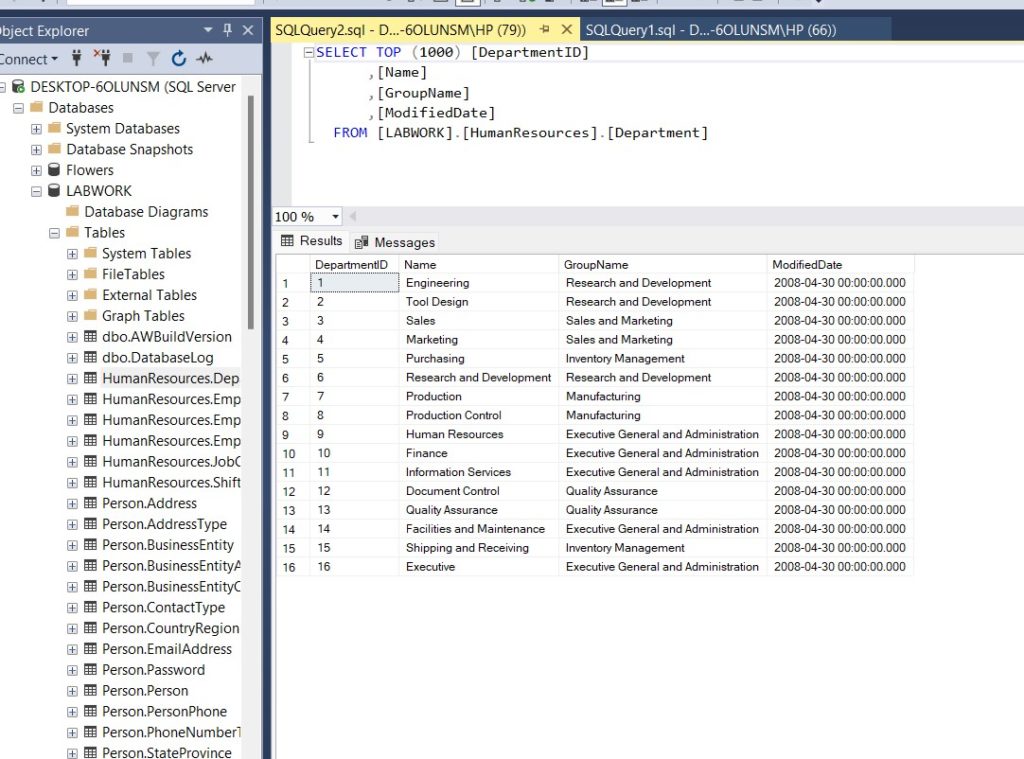
Download a .bak file from : Microsoft – AdventureWorks2022.bak_File and follow the steps to restore it. Update the Name to LABWORK. This will be the database that we will migrate to Snowflake. Let’s take a look at how our Database looks like that we are planning to migrate.
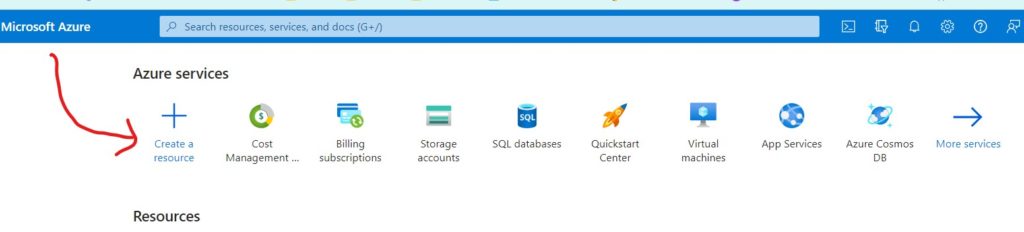
We’re getting ready for our next steps, and we need to make two things on Azure. Just hop over to the Azure portal to make them happen. If you need a quick reminder about Azure, check out my post! Exploring Azure Cloud: Building the Foundation for Data Success 😎👍
- Sign In: Log in to the Azure Portal using your Azure account.
- Start Fresh: Click on “Create a resource” on the left or search for “Storage Accounts” and select it.
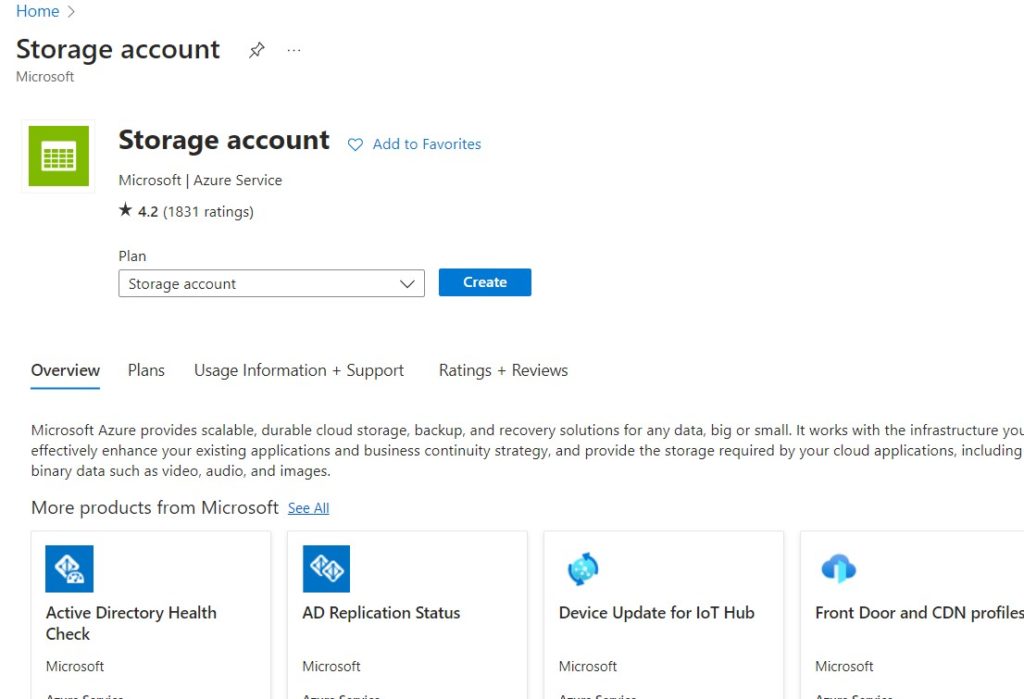
- New Storage Account:
- Hit the “Create” button.
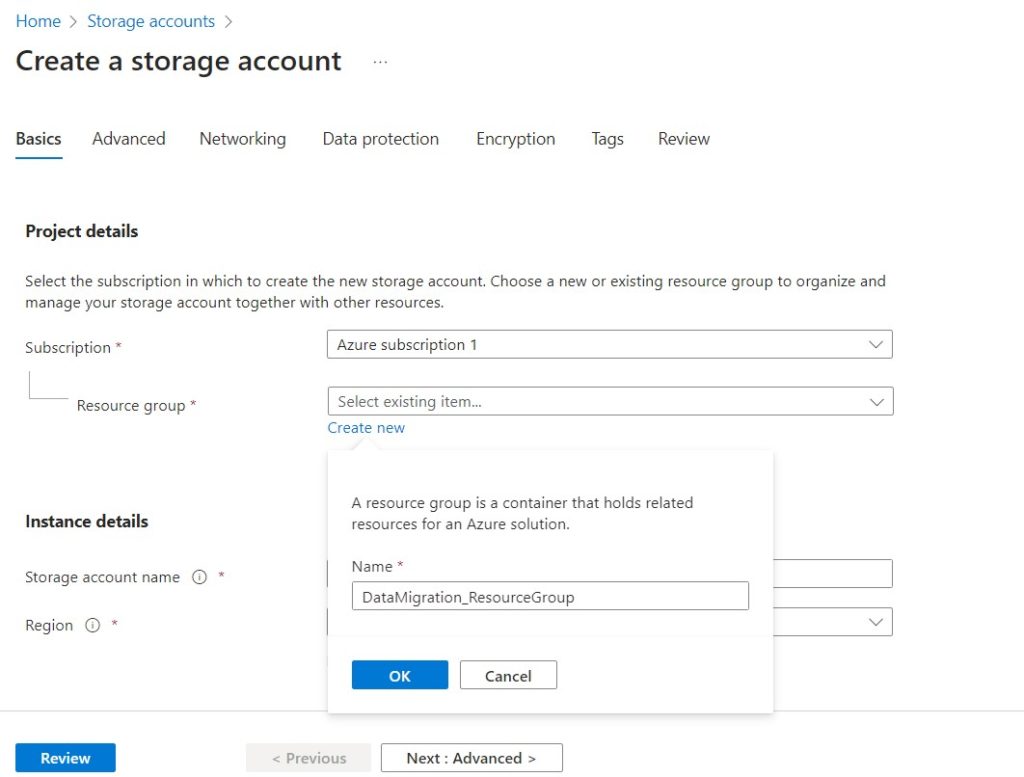
- Basic Info:
- Fill in some basics:
- Pick your Azure subscription.
- Fill in some basics:
- Create or select a resource group.
- Give your storage account a cool, lowercase, unique name.
- Choose your favorite Azure region.
- Decide between Standard and Premium performance.
- Select replication preference.
- Click “Next: Networking.”
- Networking Magic:
- Configure networking if needed, but defaults are fine for most.
- Data Protection (Optional):
- If you’re feeling fancy, tweak advanced settings like blob versioning and secure transfer.
- Click “Review + create.”
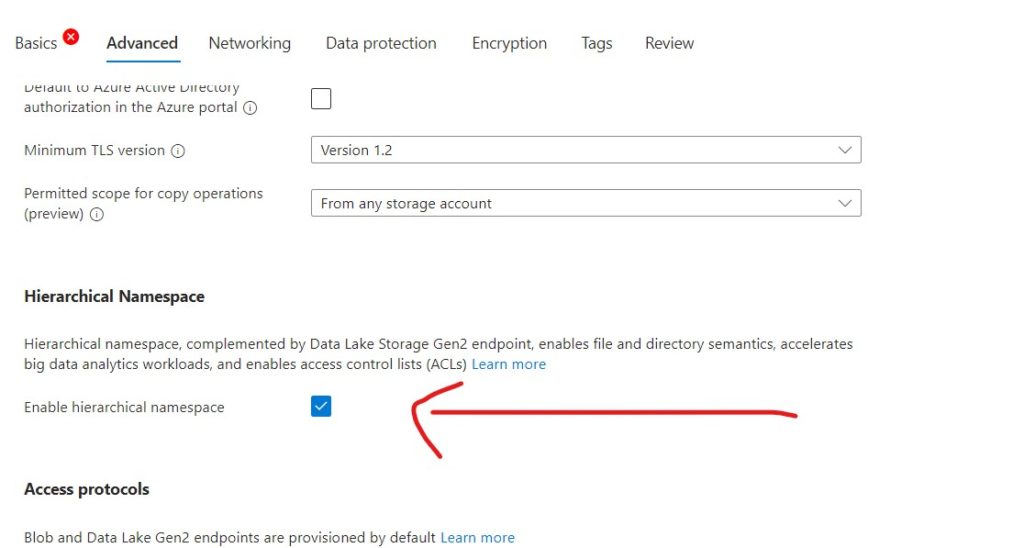
- Advanced Options (Important ! ):
- If you’re creating this storage account for Azure Data Lake Gen 2, here’s your special step:
- In the “Advanced” tab, under the “Hierarchical namespace” section, set “Enabled” to “Enabled.”
- Double-Check:
- Make sure everything looks good in the review.
- If it does, click “Create.”
- Deployment Disco: Azure does its thing, and you might see a cute deployment dance for a moment.
- Ta-da! It’s Alive:
- When it’s done, you’ll get a “Deployment complete” high-five.
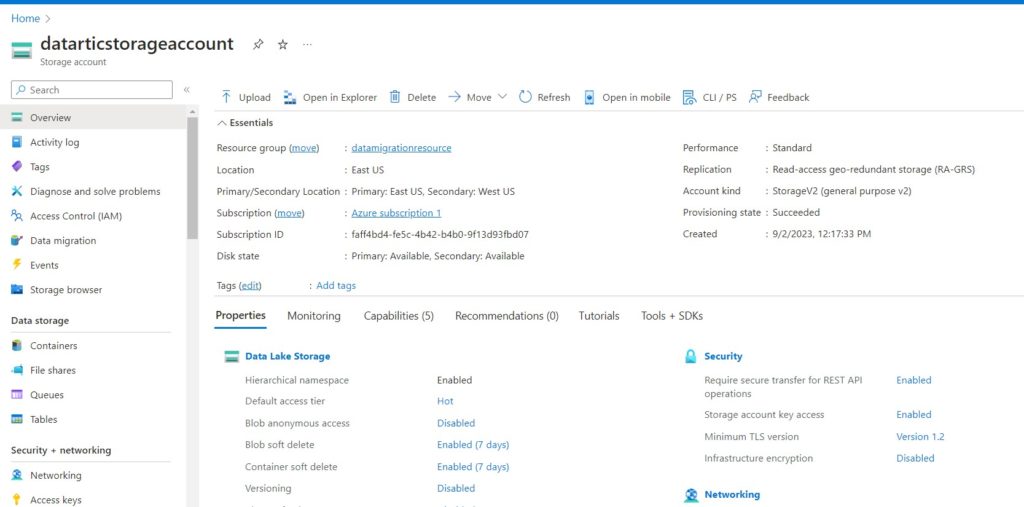
- Click “Go to resource” to see your newly born storage account!
- Blob Storage Bonus: Add a directory in the container
- While you’re here, if you want blob storage too, find “Containers” in the left menu.
- Create a new container to store your blobs. Give it a unique name.
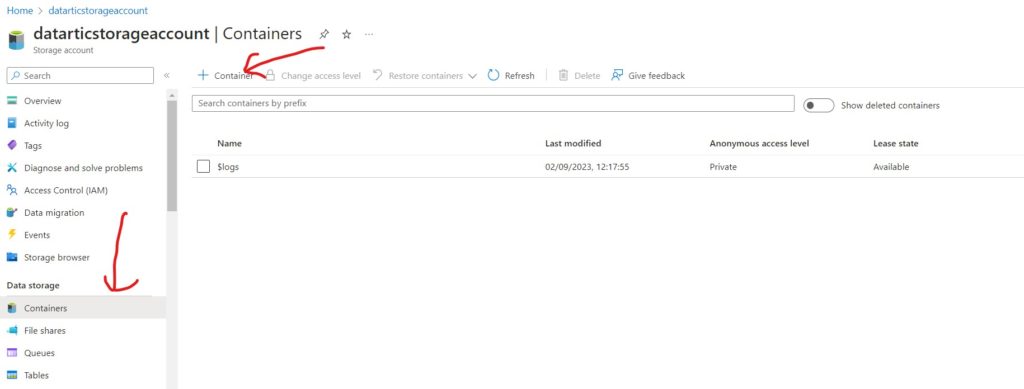
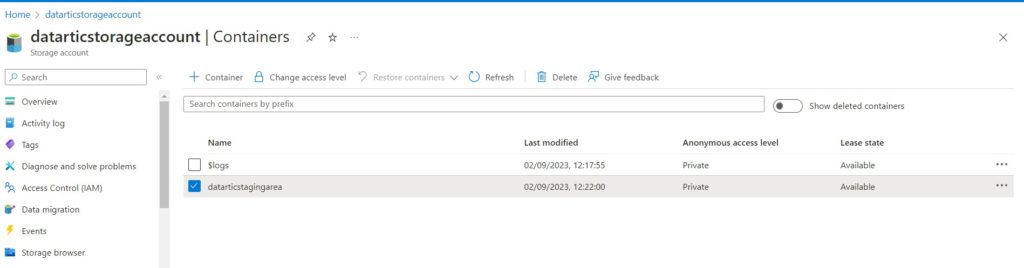
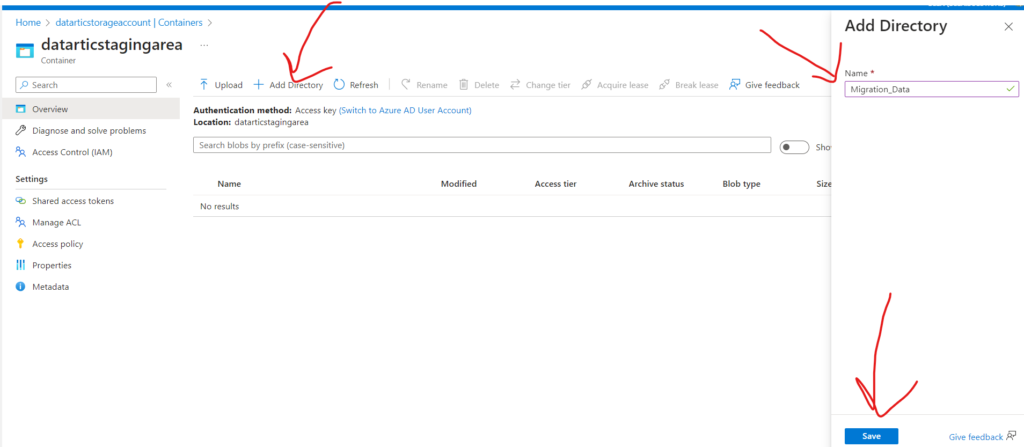
Now you’re ready to store data like a tech pro! 🚀 … If you have setup everything right then it should be look something like this
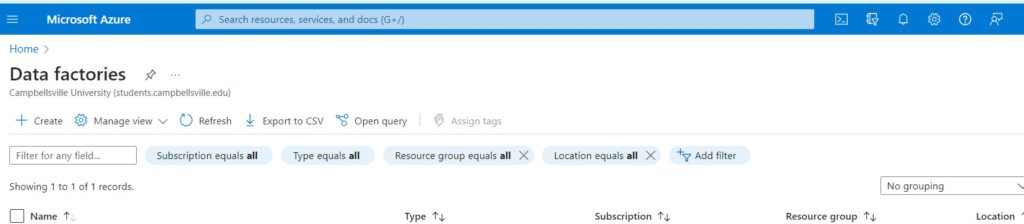
Similarly lets set up our second resource : Azure Data Factory
- Create a Resource: Click on the “Create a resource” button on the left-hand menu or use the search bar to find “Data + Factories” and select “Data Factory.”
- New Data Factory:
- Click the “+ Add” button to create a new Azure Data Factory.
- Basic Info:
- In the “Basics” tab, fill in the following details:
- Subscription: Choose your Azure subscription.
- Resource Group: Create a new one or select an existing resource group.
- Region: Select the Azure region where you want to create your Data Factory.
- Version: Choose the version of Azure Data Factory you want to use (V1 or V2).
- Name: Give your Data Factory a unique name.
- Click “Next: Networking.”
- In the “Basics” tab, fill in the following details:
- Networking (Optional):
- Configure networking settings if needed. The defaults are usually suitable for most scenarios.
- Tags (Optional):
- You can add tags for organizational purposes if desired.
- Review + Create:
- Review your settings to ensure they’re accurate.
- Click the “Create” button.
- Deployment:
- Azure will validate your configuration, and if everything checks out, it will start deploying your Data Factory. This may take a few moments.
- Deployment Complete:
- Once the deployment is successful, you’ll see a notification that your Data Factory is ready.
- Access Your Data Factory:
- Click on the “Go to resource” button to access your newly created Azure Data Factory.
It should be something similar to this

Impressive work up to this point! With all the missing puzzle pieces in your hands, it’s time to weave them together seamlessly. Let’s connect the dots and bring this masterpiece to life! …. Lets review our architecture
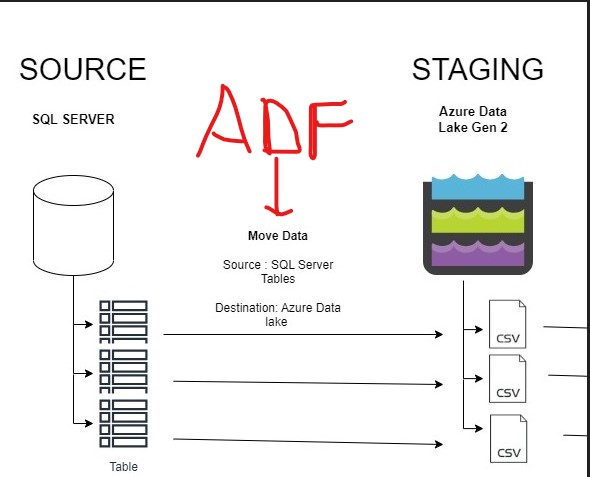
Orchestrator : Azure Data Factory ( ADF )
Our main orchestrator here is ADF think of it as cloud-based SSIS (if you know SSIS). ADF is like a user-friendly puzzle where you drag and drop pieces to set up pipelines, connections, and everything needed to move data from POINT A to POINT B. Let’s open it up !

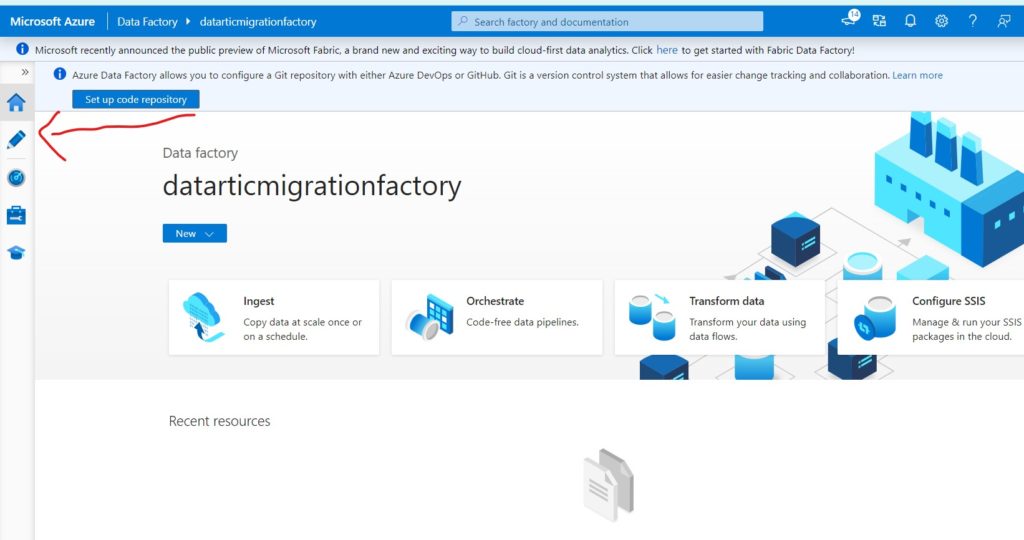
Click on the Pencil Icon to author Pipelines
DATA MIGRATION – SQL to ADLS2 PHASES
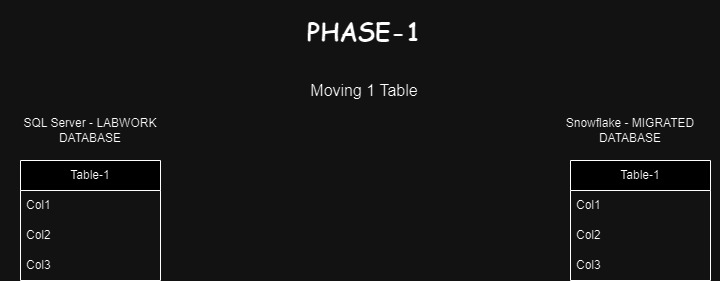
We will divide the migration from SQL to ADLS2 into two Phases :
- Phase -1 : Migrate only 1 Table
- Phase -2 : Migrate all Tables Dynamically.
PHASE – 1
Create your first ADF Pipeline !
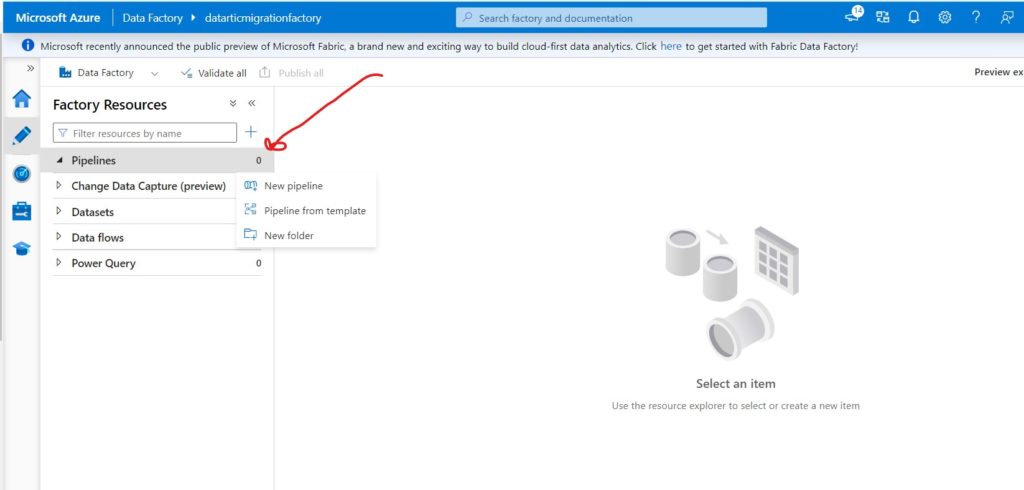
Maybe give it a name SQL_to_ADLS2_One_Table . Search for Copy activity.
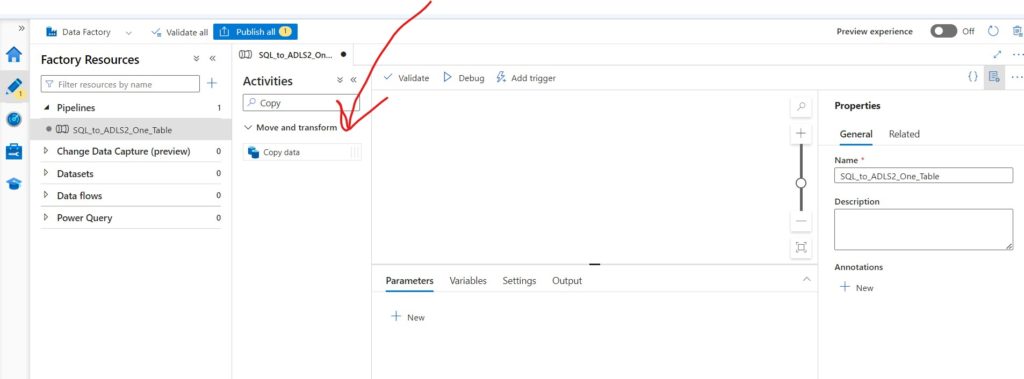
Drag & Drop it into the whitespace. Rename it to something understandable to what it does.
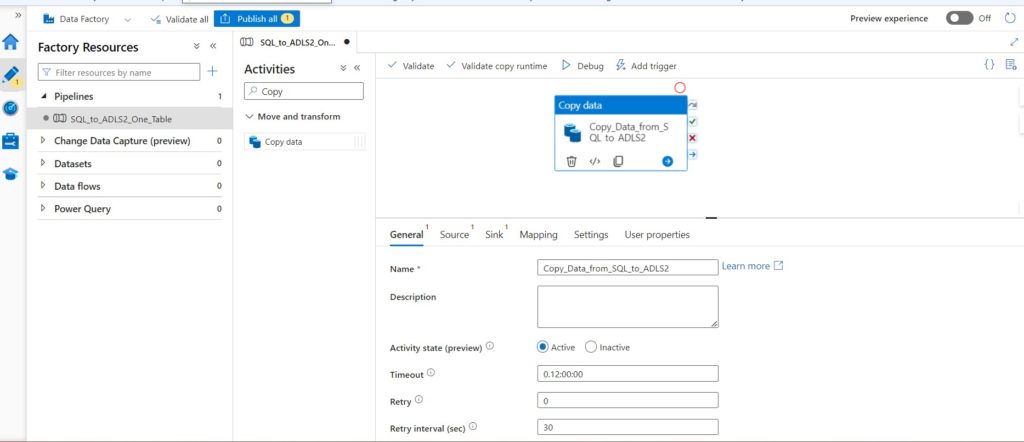
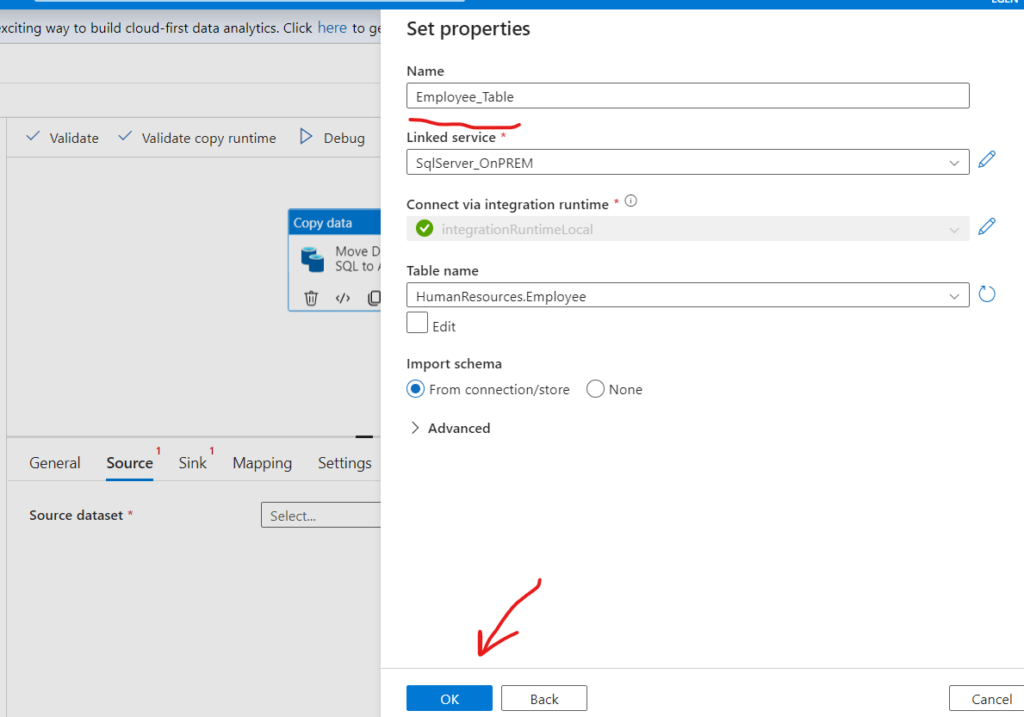
Defining – Source
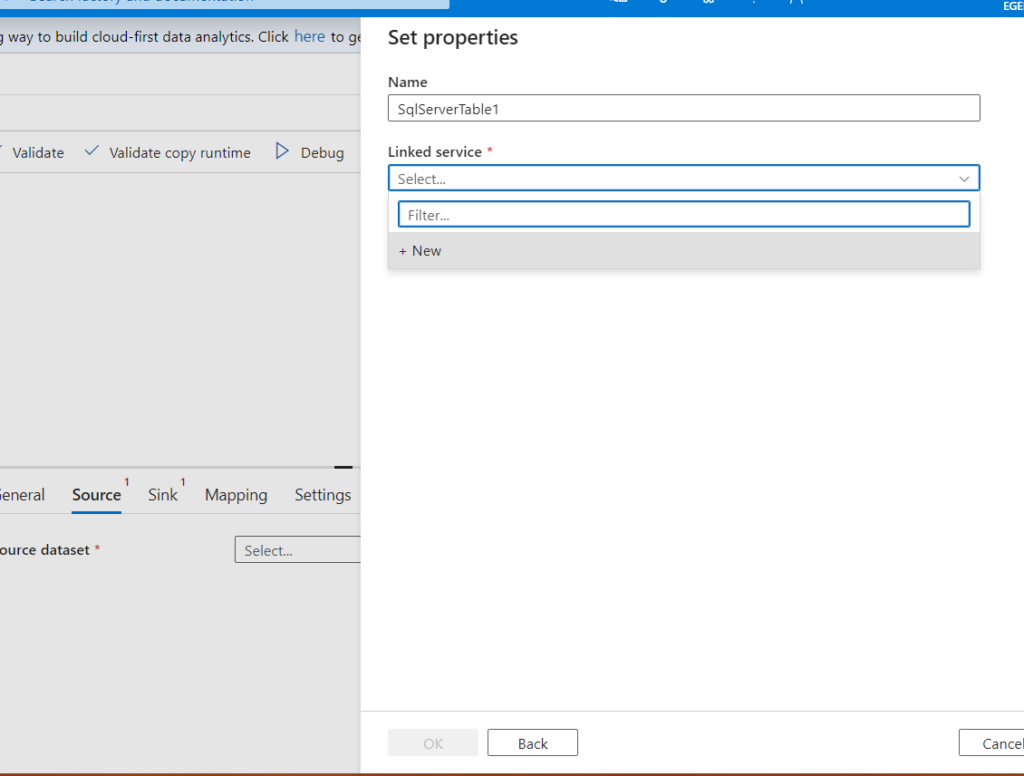
Since initially everything is undefined you can start defining your source. But any guesses on what your source would be? …. Yes you guessed it right , its SQL Server !
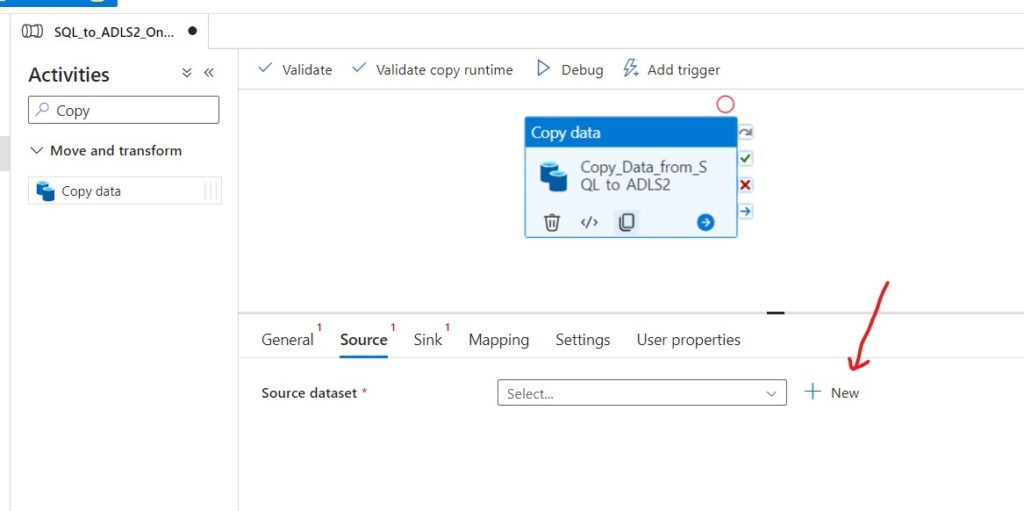
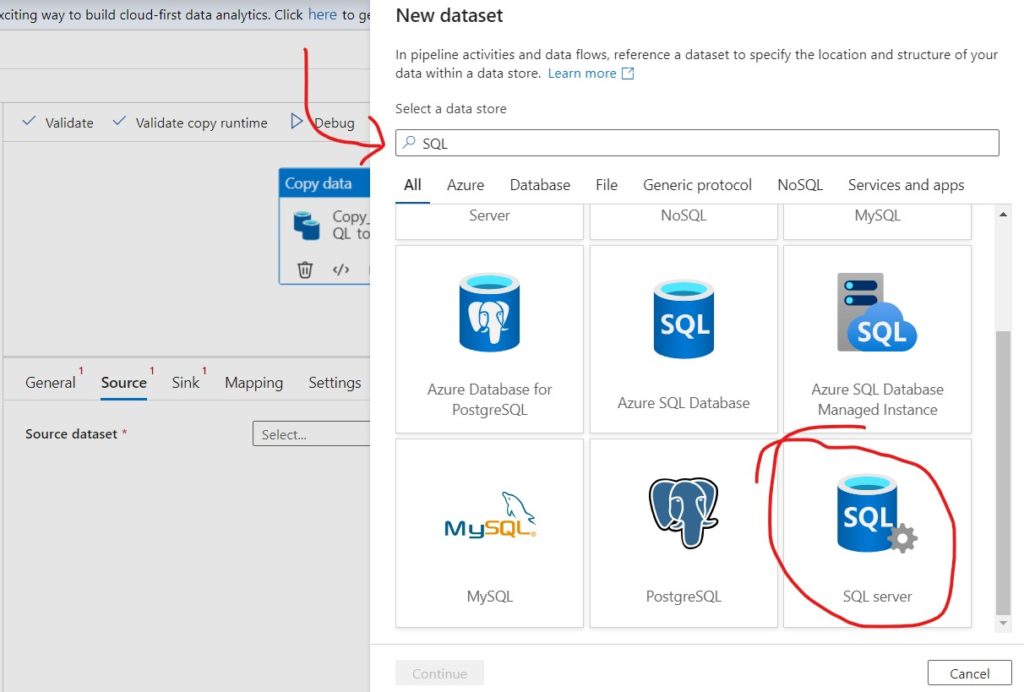
Select SQL SERVER and Create a new Linked Service

Adsafsaf
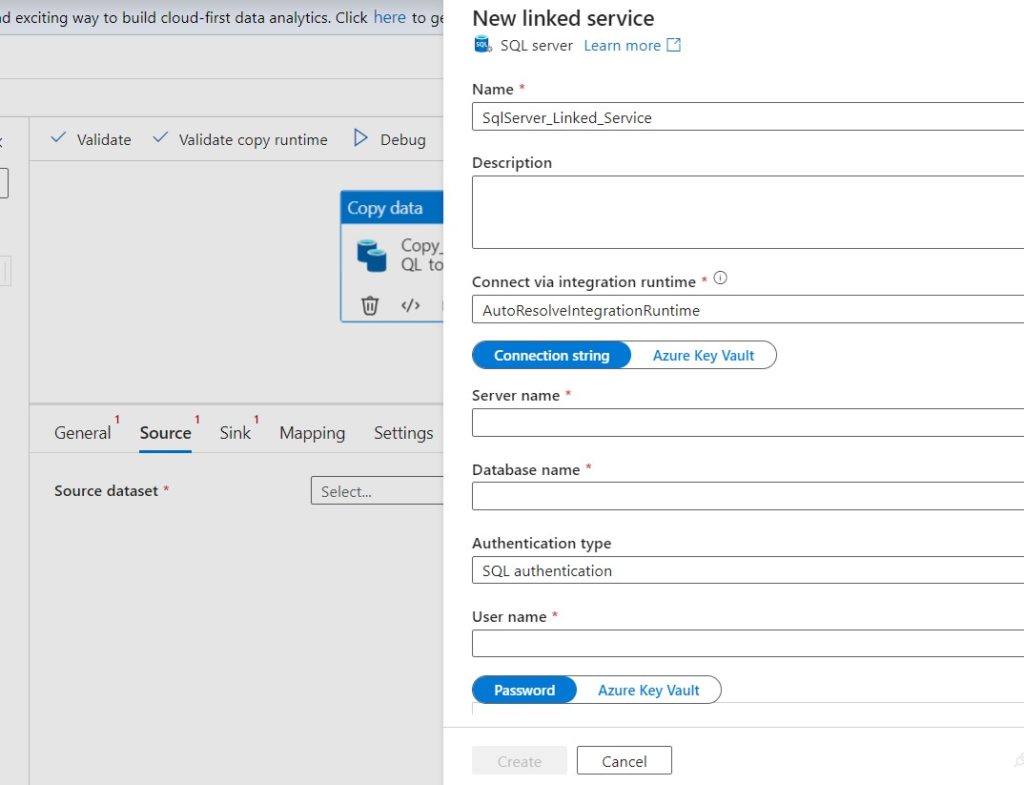
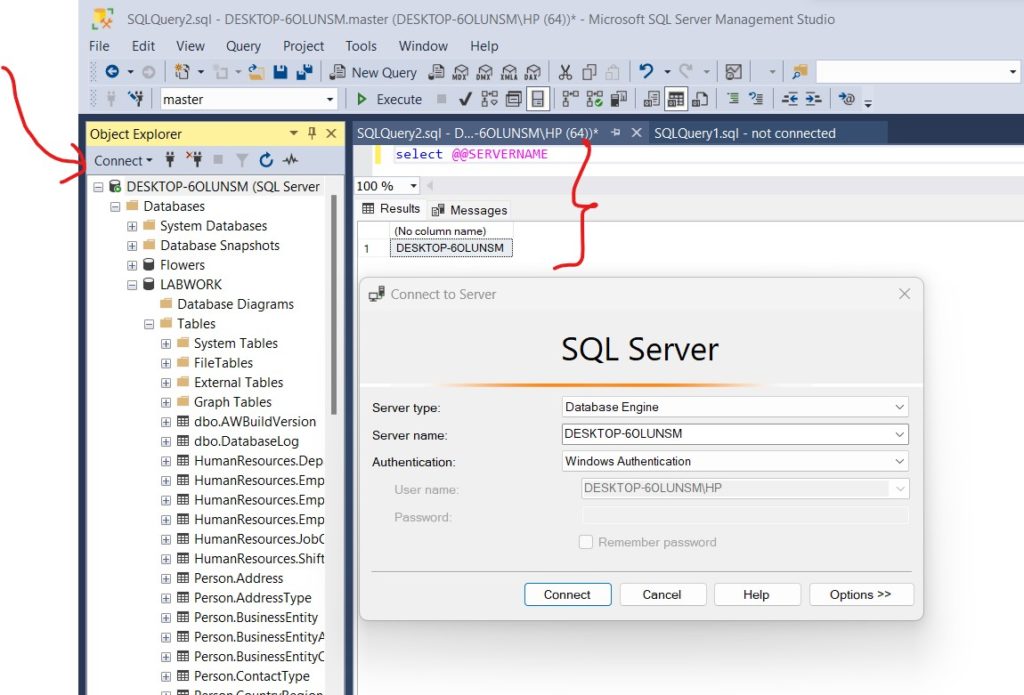
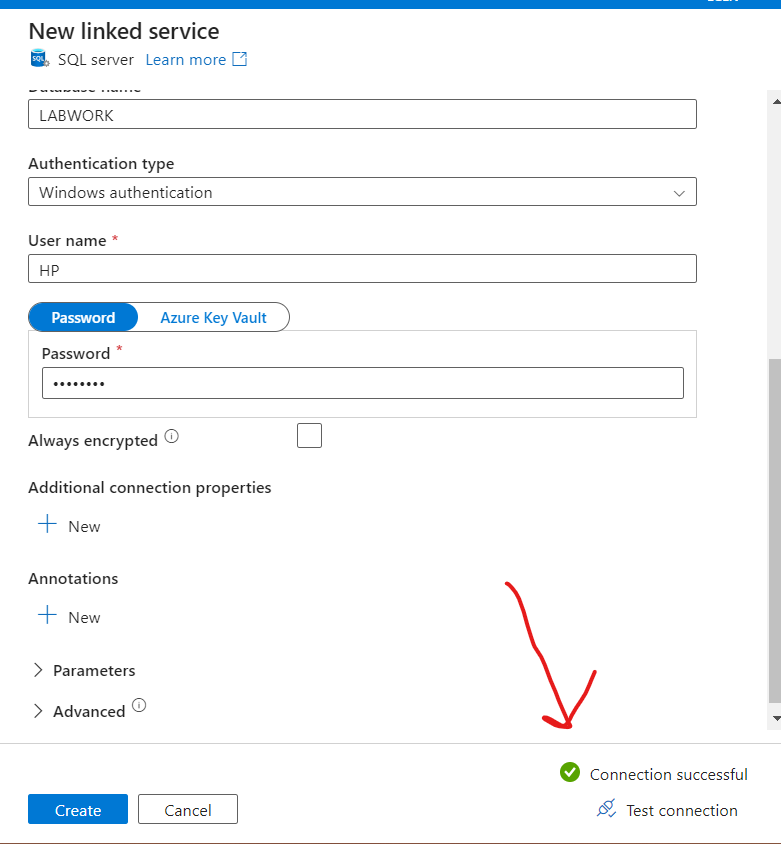
Define your SQL Server Connection Details which you can get it from your server. In my case the local server would look like :
But Wait…. ADF doesn’t about my SQL !
When you create a Linked Service, think of it as introducing your Azure Data Factory (ADF) to your SQL server. It’s like matchmaking! This connection links ADF and your SQL server together, but here’s the catch – you need to install something called an Integration Runtime (IR) on your local machine to make it work.
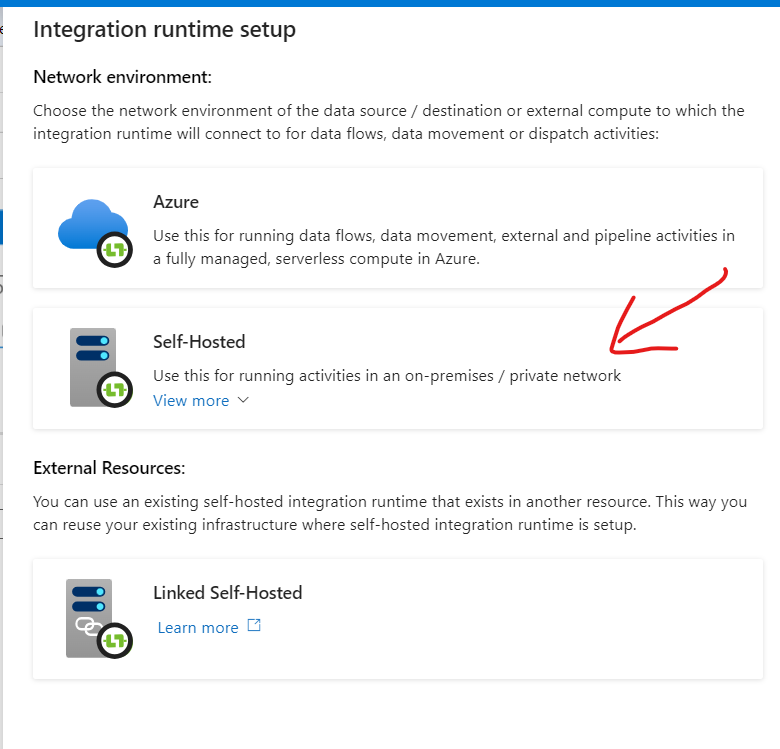
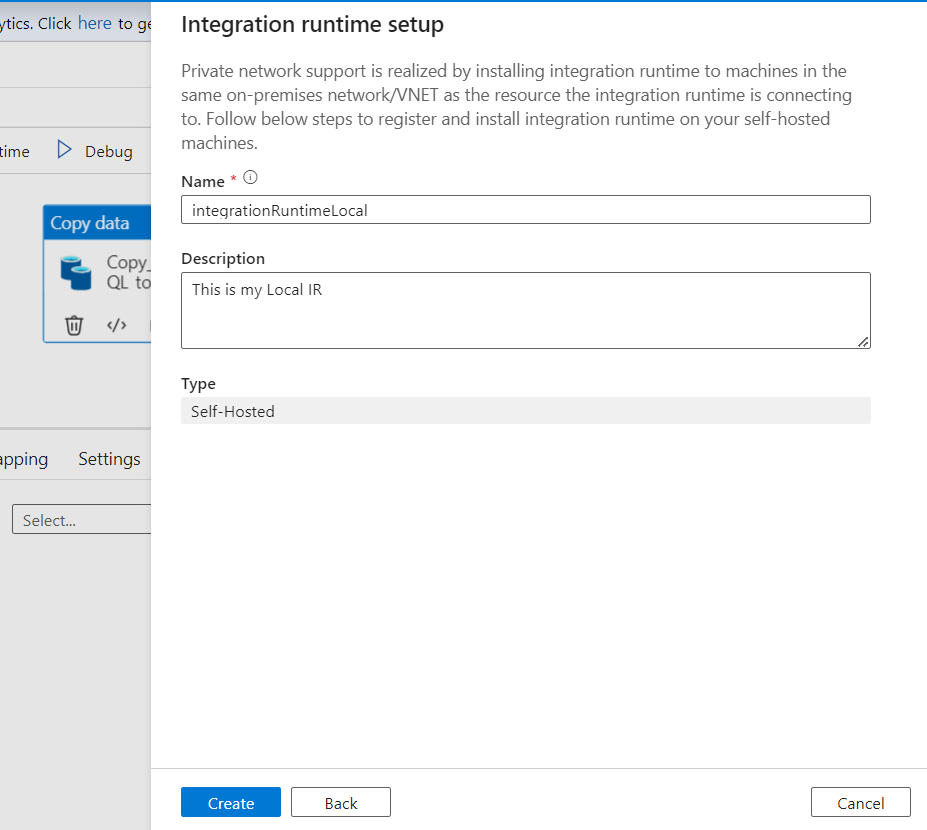
You can choose which one to select. Lets go with Option 1 !
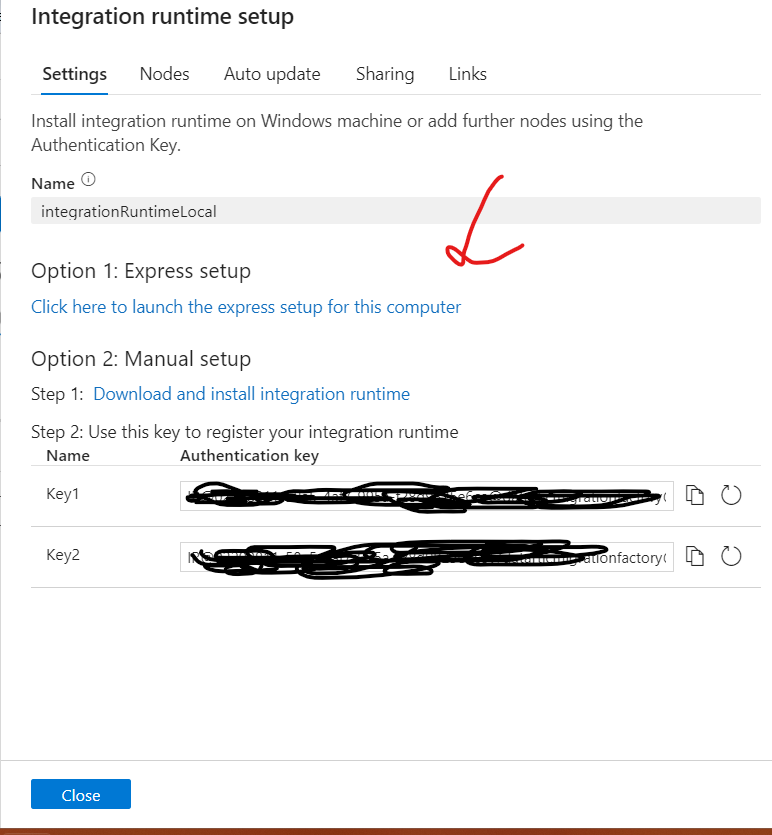

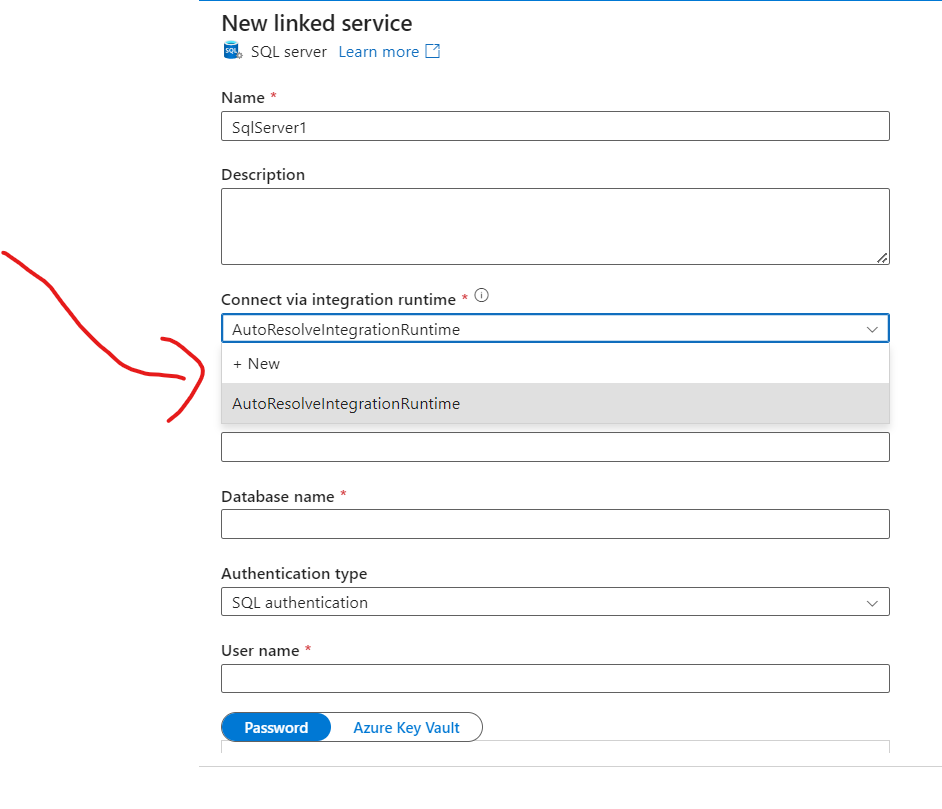
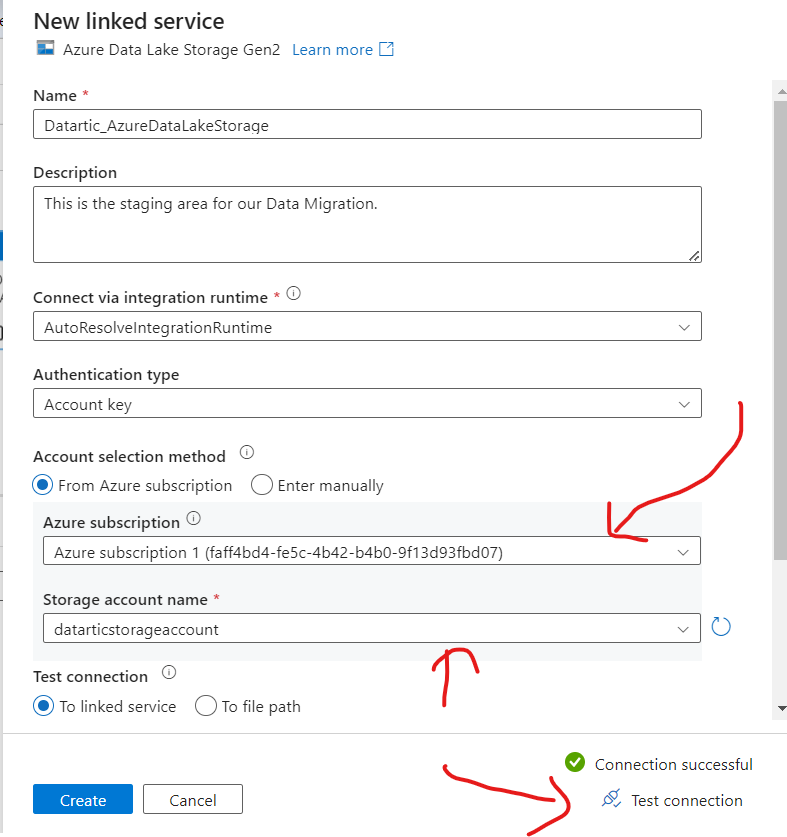
Alright so going back to our defining of our Linked Service : Click on New
Select Integration Runtime that you defined and add all your Credentials here
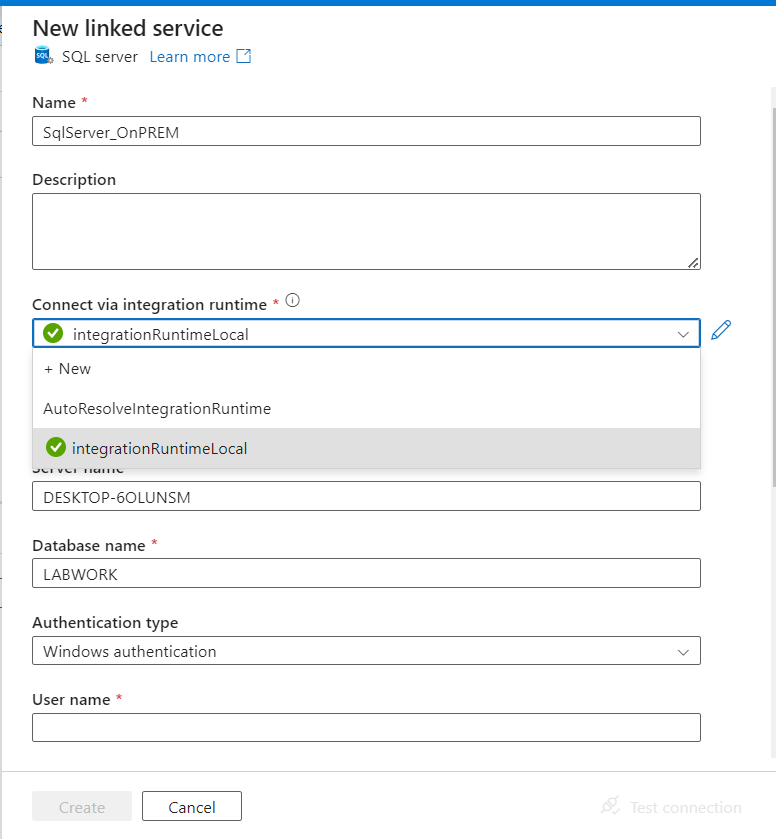
Test your connection and hit “CREATE” !
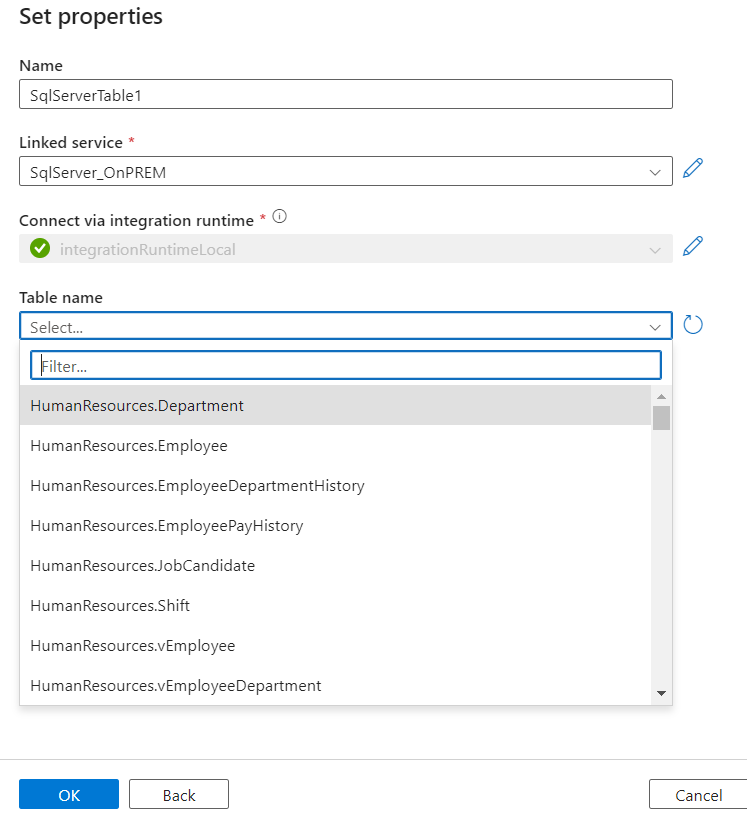
You should now be able to see list of tables in that Database
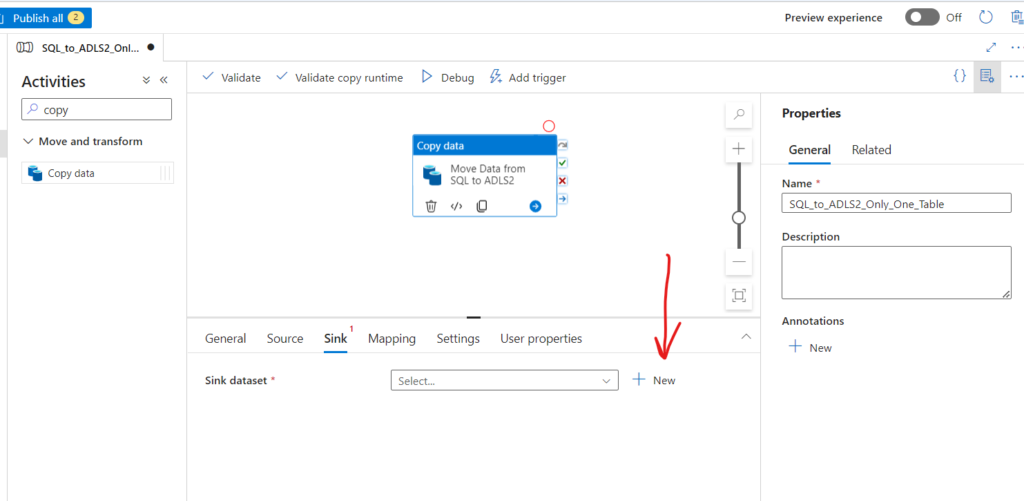
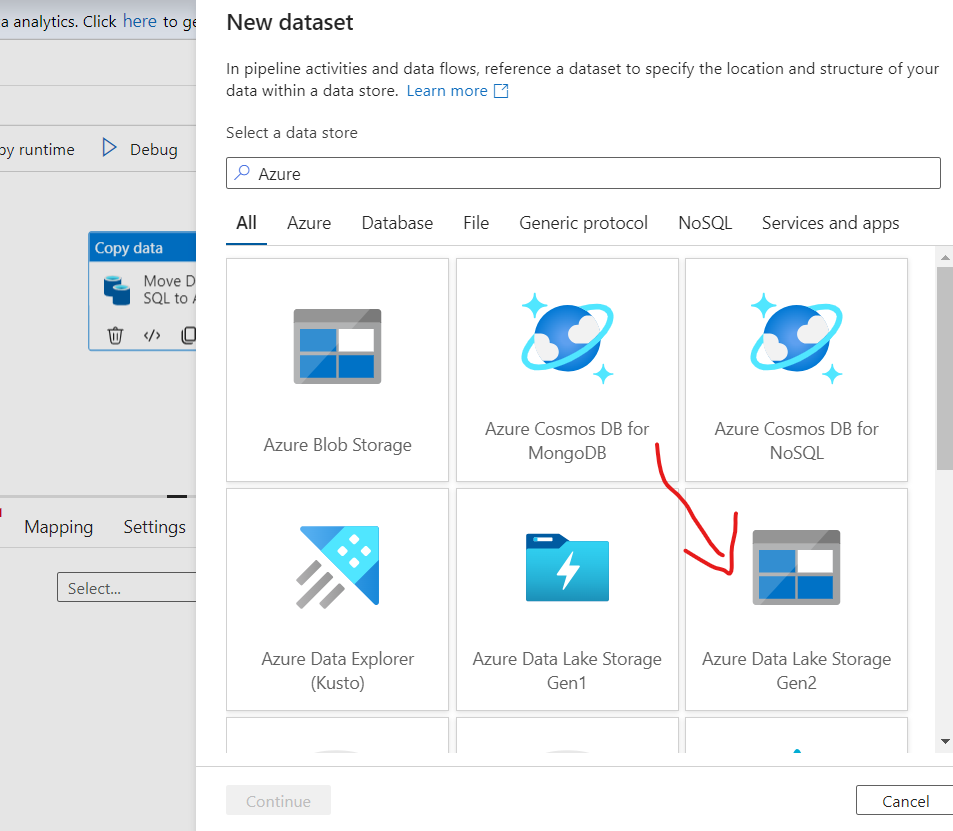
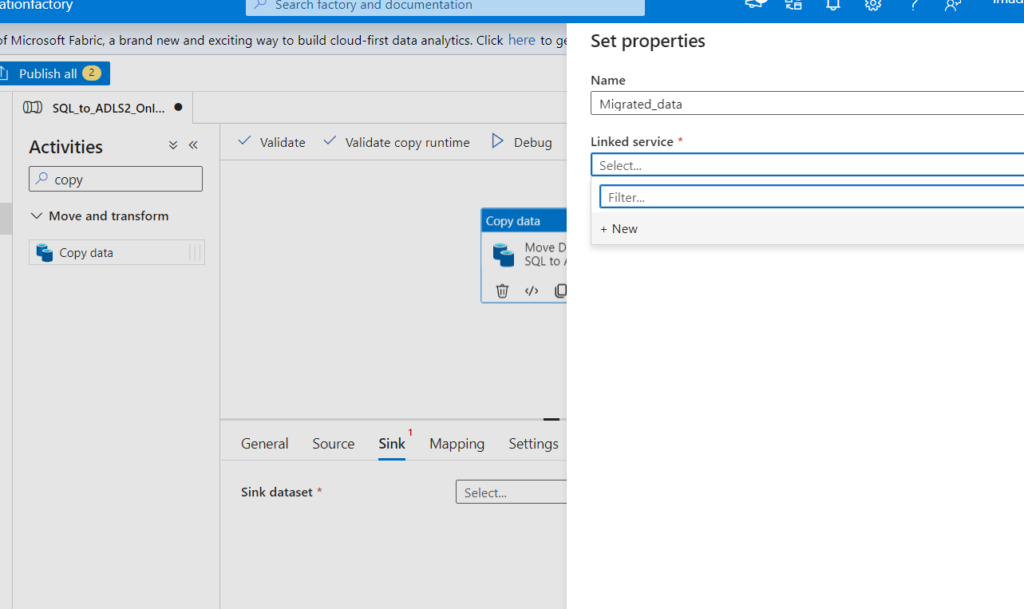
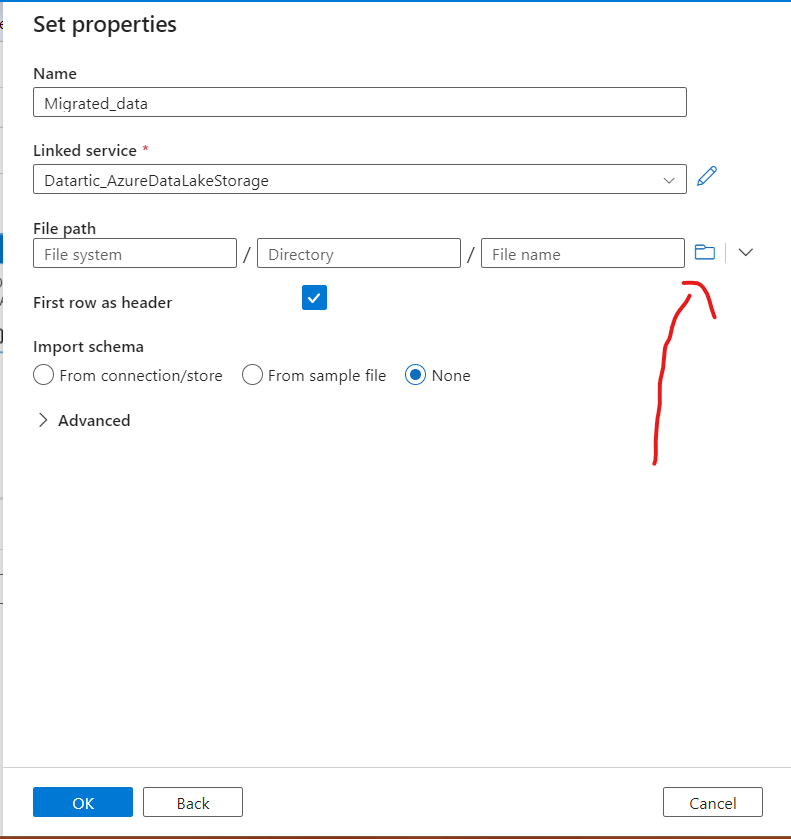
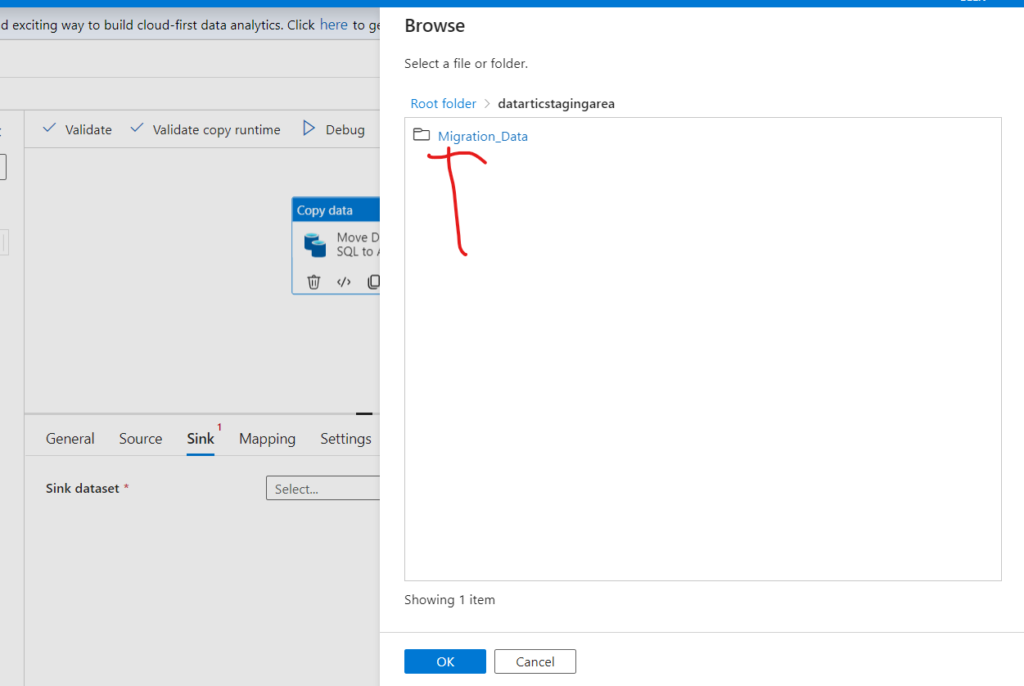
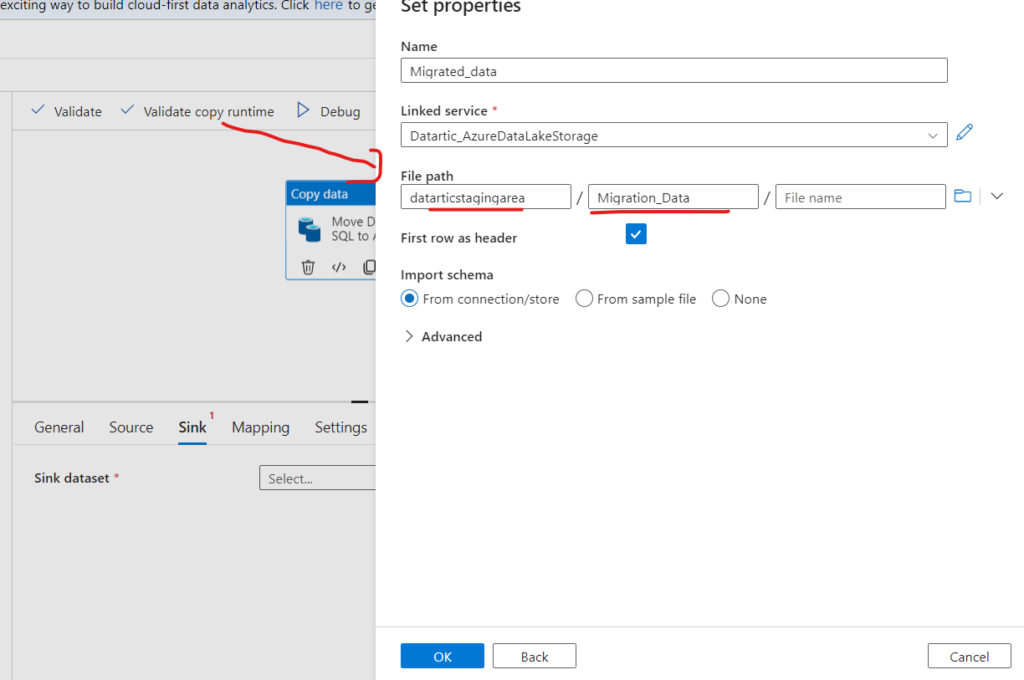
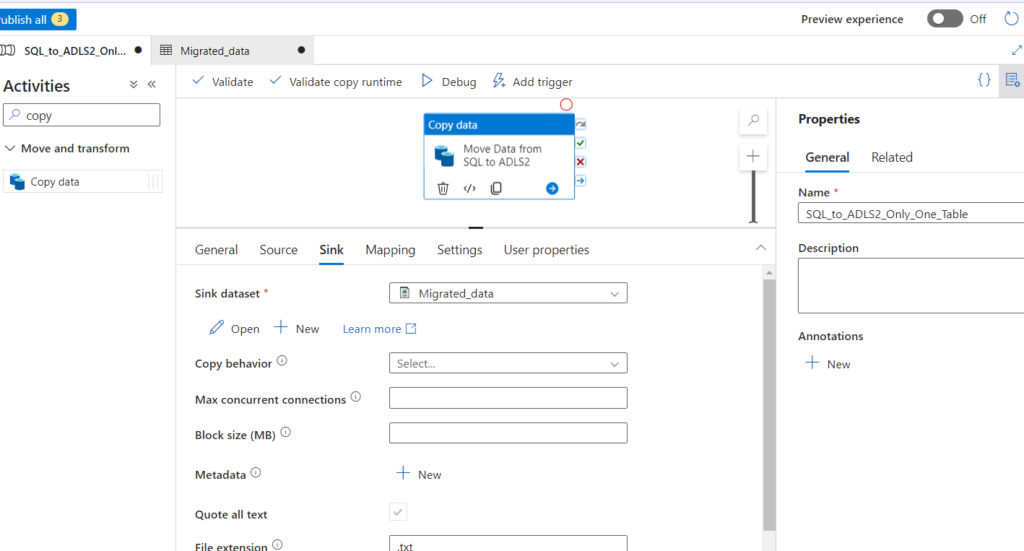
Defining – Sink
All right now that our Source and Sink are defined, lets hit that Debug button !
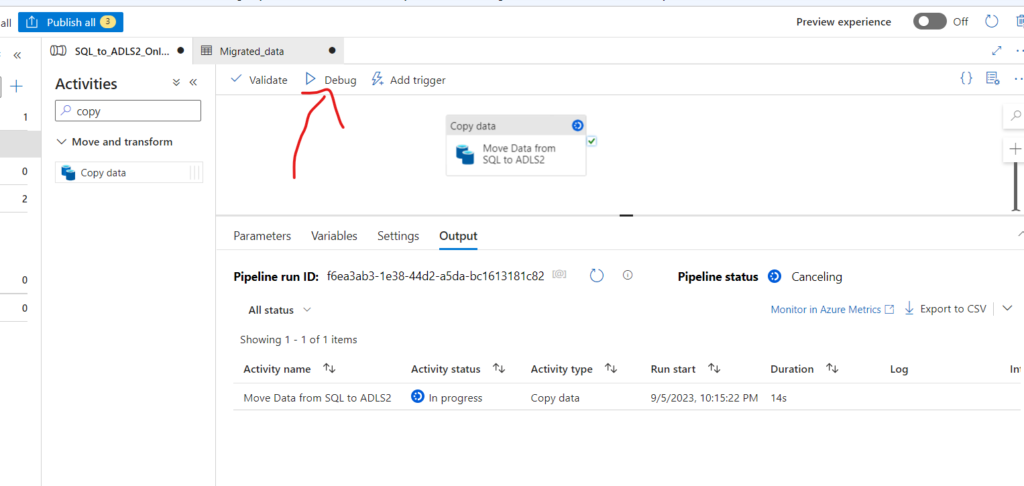
Once its all Done , Head to your Azure portal to see the results !
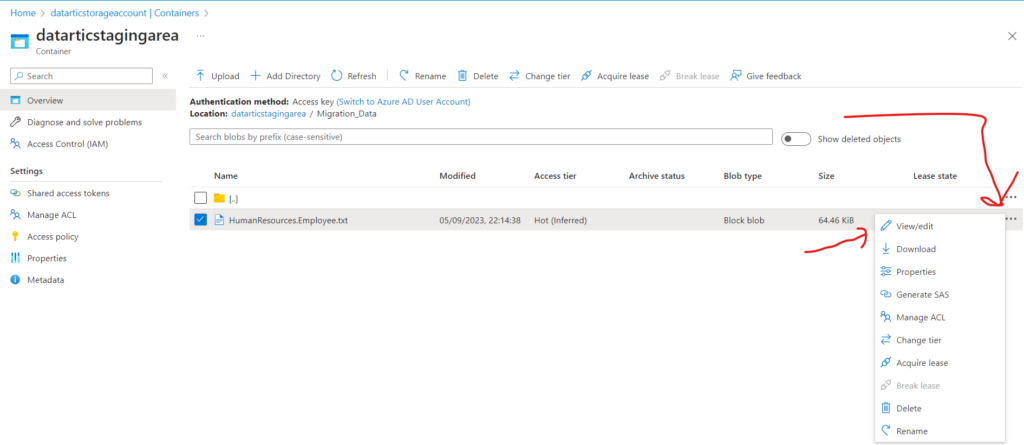
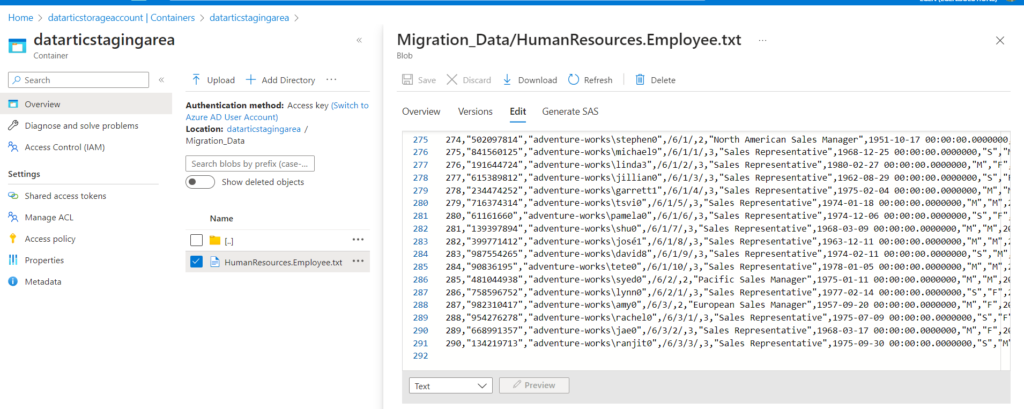
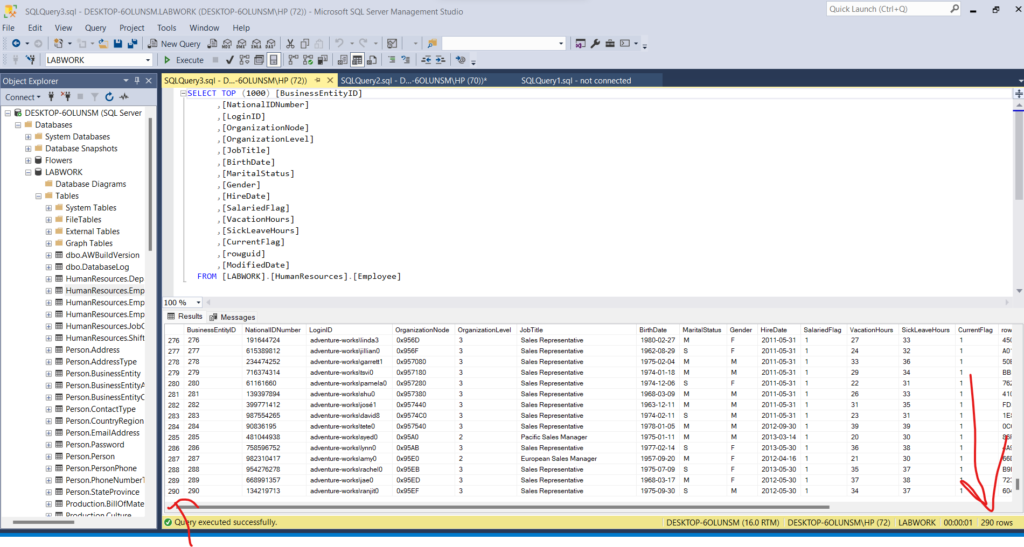
Validation
Looks like there are 290 rows in the migrated excel file. Lets Validate this in our SQL server
Kudos to you for reaching this point and successfully wrapping up Phase 1 of the Project! It was quite the journey. Now, be sure to treat yourself to some well-deserved rest, and we’ll reconvene on Day 4 at Datartic. See you then!
Data migration: Where ‘Ctrl+C’ and ‘Ctrl+V’ become an art form.
– Anonymous